Beans, for dessert???
Traditional Spring Desserts Made with Beans (Part 1)
The smell of spring is in the air and flowers are already in bloom. I can already see the cherry blossoms blooming along the streets, although it seems a bit early this year. Springtime in Japan is probably one of the most beautiful times of year. It is a season when families and friends gather in parks filled with Sakura and have picnics. Keeping Spring in mind, today I will show you how to make two different kinds of Traditional Japanese Spring desserts using beans!
Beans are usually thought of as something to be eaten as a savory dish. The thought of sweet beans for some people may sound gross, but give it a try! In Japan it is common to use beans in all different kinds of sweets. Most commonly used beans are azuki beans (used in anko) and lima beans (used in shiro-an).
Beans provide many health benefits as they are high in magnesium, iron, and vitamins. Choosing sweets made from beans is a more nutritional choice.
The following recipes use anko (red bean paste) and shiroan (white bean paste). It is pretty easy to find red bean paste in Asian grocery stores, however white bean paste may be a little bit more difficult to buy. Both taste much better if you make them yourself though. But making bean paste definitely requires a little extra time and energy! Please refer to my anko and shiroan recipes if you would like to make them from scratch!
I will show you how to make two different kinds of desserts using beans! :
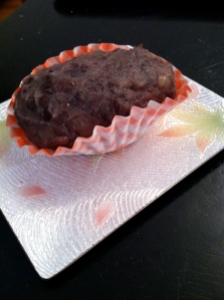
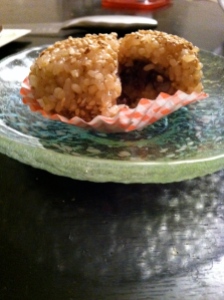
Ohagi: Red Bean, Sesame Red Bean
Ichigo Daifuku: White Bean
Ohagi
Ingredients:
Sweet Brown Rice…2cups
Sesame Seeds
Sea Salt…2 pinches
- Cook sweet brown rice as you would regular rice.
- When rice is ready, mix in two pinches of salt (don’t forget this part).
- Now you will need to smash the rice so that it becomes half beaten. You want to beat it to a point at which you can still see rice grains but also can form it into a cake that sticks together. You can do this by laying the rice between to sheets of plastic wrap and pounding it with a rolling pin. You can also put it in a plastic bag and pound it like that as well.
- Once you have pounded the rice to the point that it is half pounded, take rice and start shaping it into ovals.
Red Bean Ohagi
- Use the ovals you made in part one and cover them with the red bean paste. It is easier if your hands are slightly wet so that the beans don’t stick to your hand.(but don’t make them too wet or the flavor will be effected!)
- Now prepare to get messy! I find that the easiest way of putting the red bean on is to use your hand and coat the rice. The thickness of the coat of red bean is up to you but I prefer about a ½ inch coating.
Sesame Ohagi
- Use the half beaten rice and put it on a piece of plastic wrap and create a disk. Once you have created the disk, put some red bean in the center.
- Close it up like a dumpling and shape it again in the same shape that you made the previous ohagi.
- Coat the outside with sesame seeds and sea salt.
After you have coated all of your ohagi it is ready to eat!
Note: Ohagi really doesn’t last very long so only make the amount you can eat within 2 days. In warmer temperatures it may only last a day ( believe me I ate it after 3 and it was incredibly sour! So don’t take the chance.)
Ichigo Daifuku (Up Next!)


